GitHub Desktop is an amazing way for people to locally edit their GitHub file repositories without any scripting, but did you know you can also use GitLab repositories with GitHub Desktop? For educators, this is very valuable as with the open source app GitLab you can use one of your own institutional servers for storing files.
The following step-by-step tutorial, which includes steps to make a GitLab repository available with GitHub Desktop, usually just takes several minutes.
Getting Ready
1.1 Download and install GitHub Desktop
1.2 Download and install a text editor (i.e. Atom.io or Brackets.io)
This guide describes the step for both the current version of GitHub Desktop (refered to as the ‘New Native’) and the original version of GitHub Desktop.
Using GitHub Desktop (New Native) with GitLab
1. Get Repository HTTPS Address
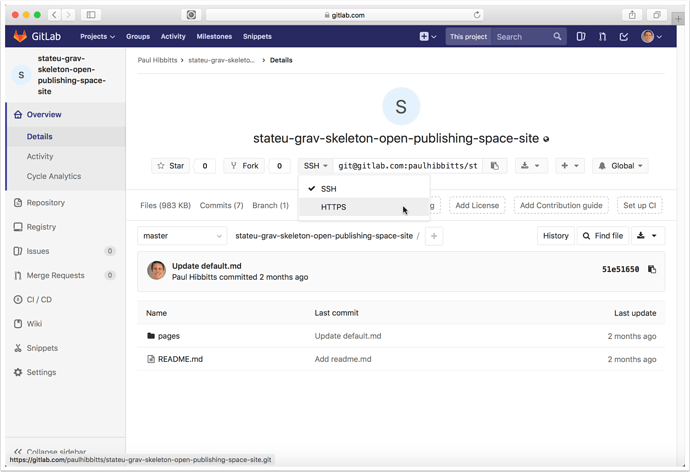
1.1 Go to your GitLab project (repository) and tap on "HTTPS" to view that address for the repository
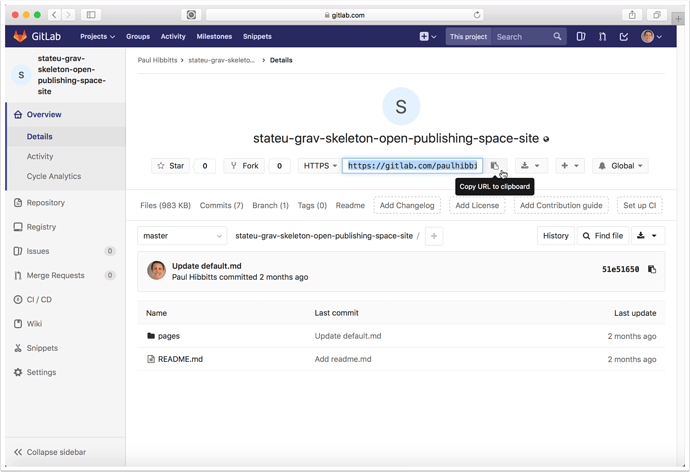
1.2 Copy the HTTPS address of your GitLab project repository
2. Clone Repository
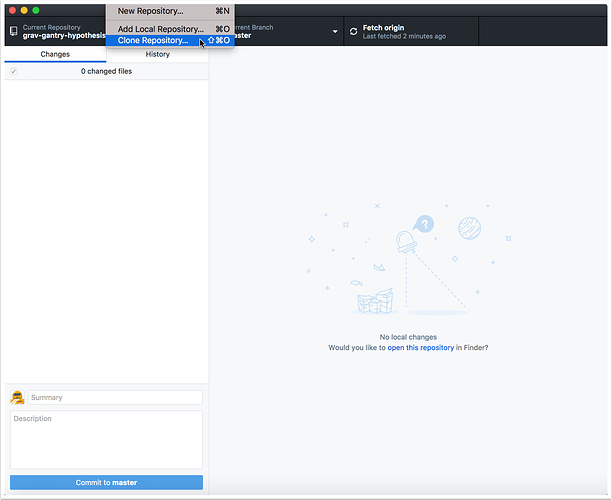
2.1 Launch GitHub Desktop and tap the "File" menubar item and choose "Clone Repository..."
2.2 Tap the "File" menubar item and choose "Clone Repository..."
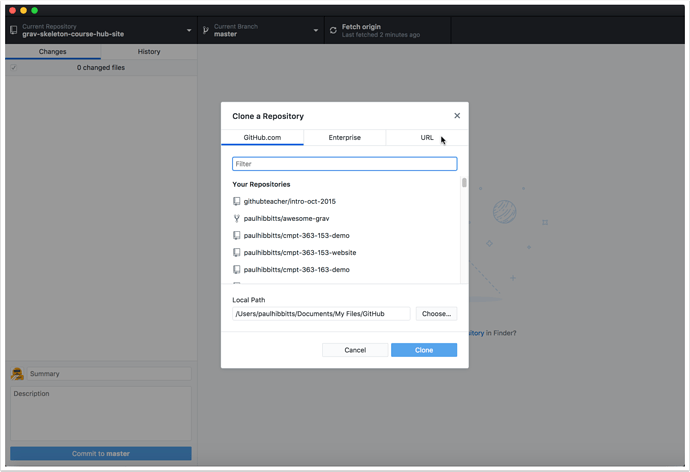
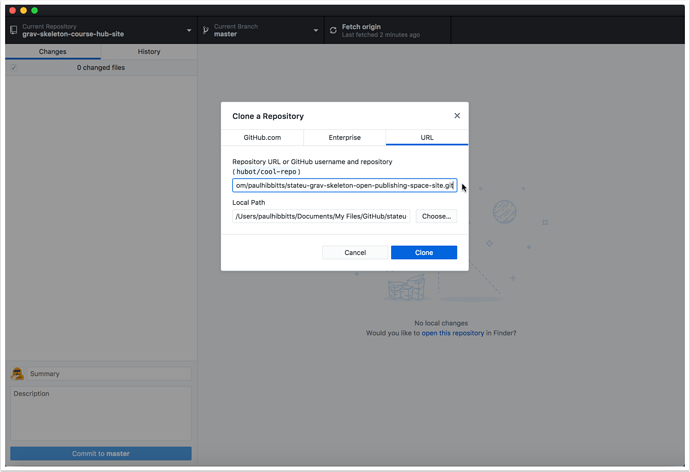
2.3 Tap on the "URL" tab
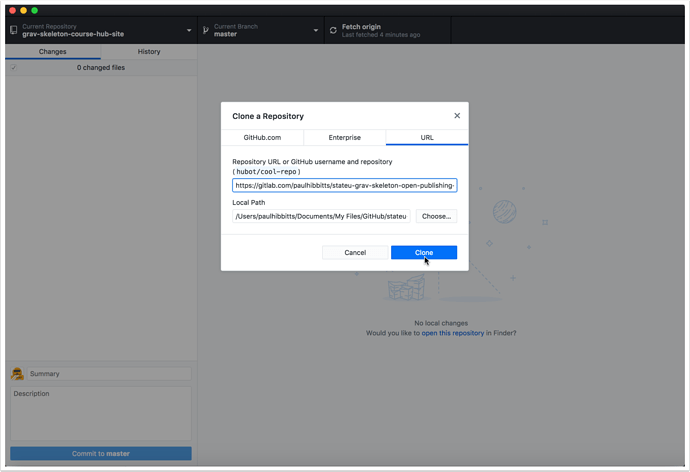
2.4 Paste the previously copied HTTPS URL into the repository URL field
2.5 Tap the "Clone" button
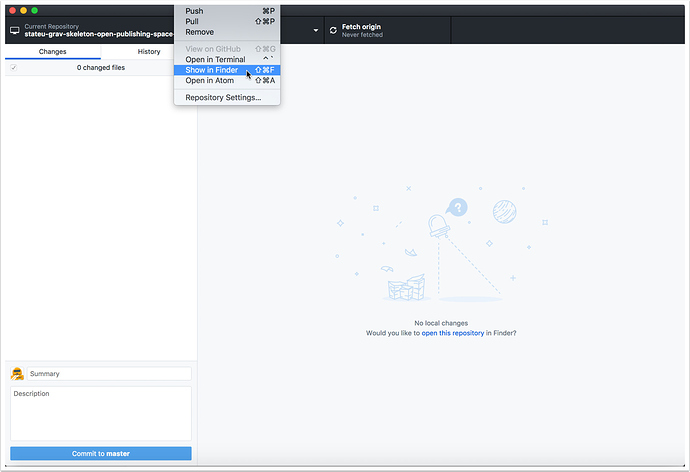
2.6 Tap the "Repository" menubar item and view it's local folder
On a Mac, choose "Show in Finder"
On Windows, choose "Show in Explorer"
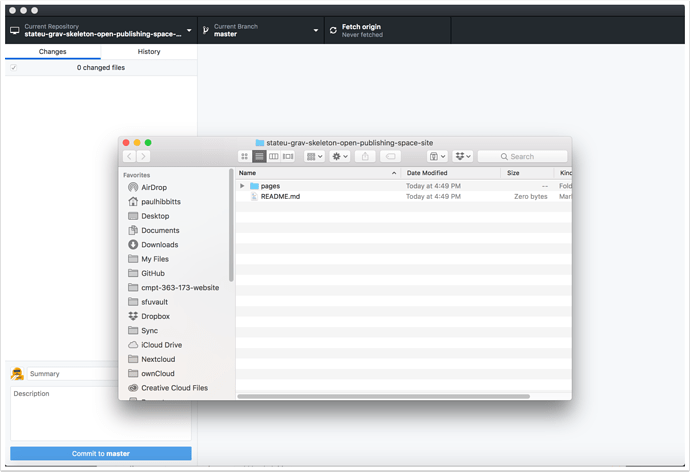
2.7 Review the files of your cloned GitLab repository.
You can now edit these files locally, and use GitHub Desktop to push changes to your GitLab repository.
Using GitHub Desktop with GitLab (original version)
1. Create Local Repository
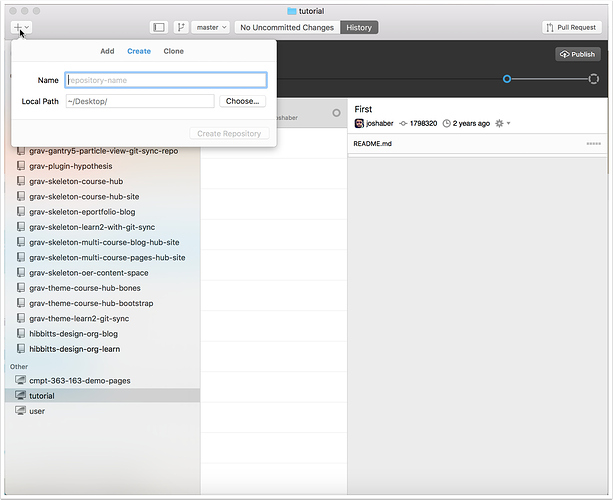
1.1 Tap on the "+" button in the upper-left of the GitHub Desktop window
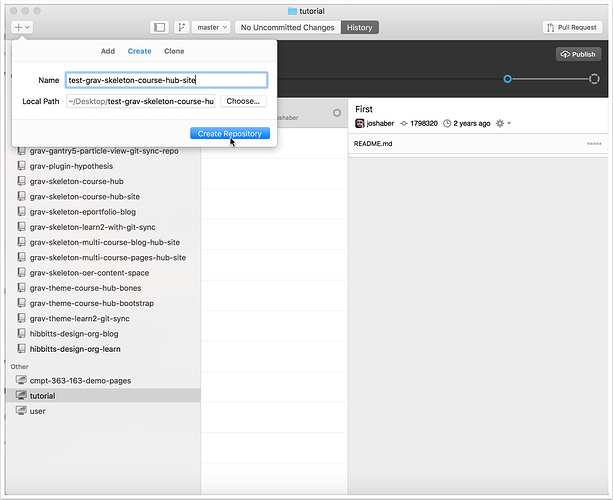
1.2 Enter the name of your new repository in the "Create" panel and tap "Create Repository"
While you can name this repository anything, it is recommended to use the same name as the GitLab repository that you will be using.
2. Link Remote Repository
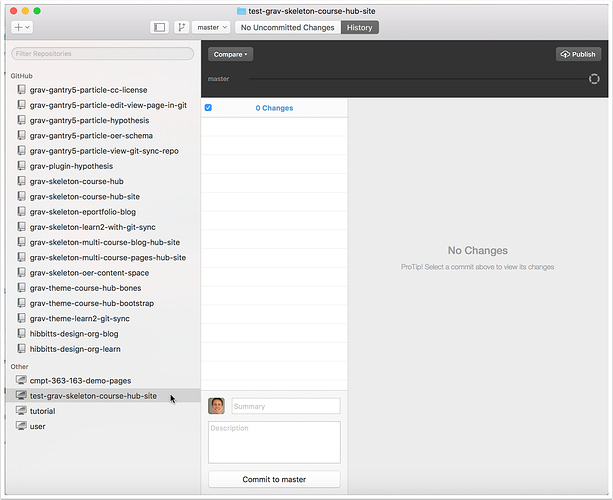
2.1 Select your newly created repository (if not currently highlighted)
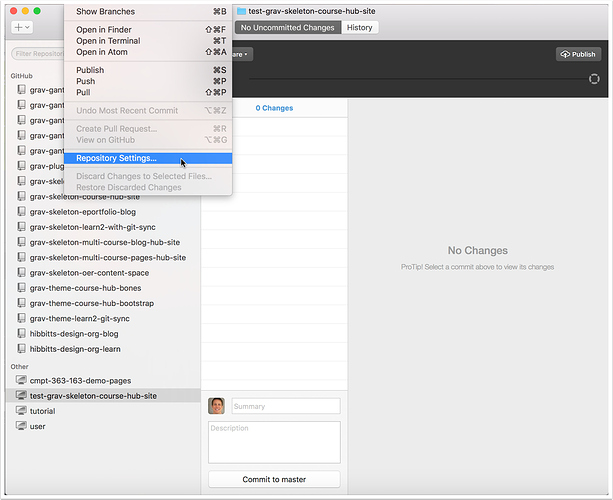
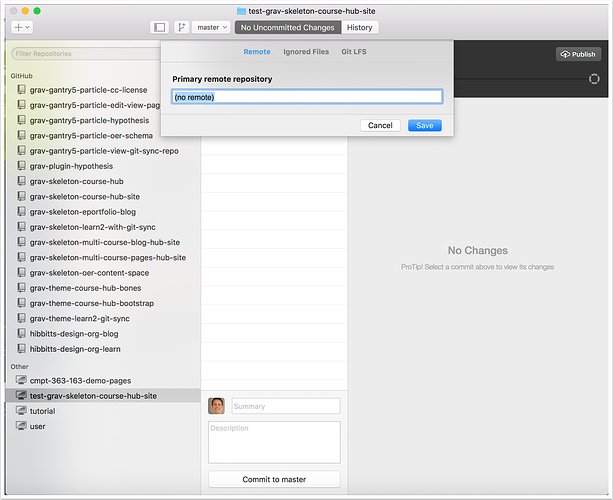
2.2 View the settings for your newly created repository
On Mac, tap the "Repository" menu and chose "Repository Settings...".
On Windows, tap on the gear icon in the upper-right of your GitHub Desktop window.
2.3 Open your Browser and sign into your GitLab account (with the "Remote" panel visible for your repository)
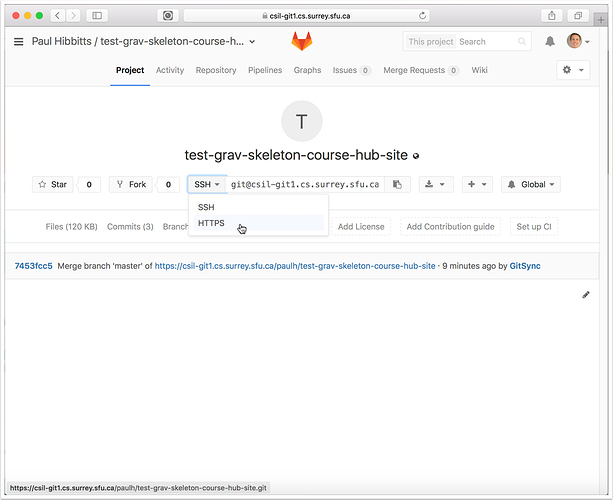
2.4 Go to your GitLab project (repository) and tap on "HTTPS" to view that address for the repository
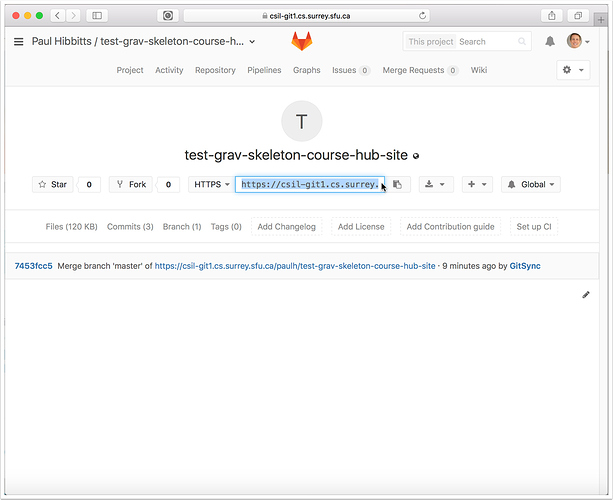
2.5 Copy the HTTPS address of your GitLab project repository
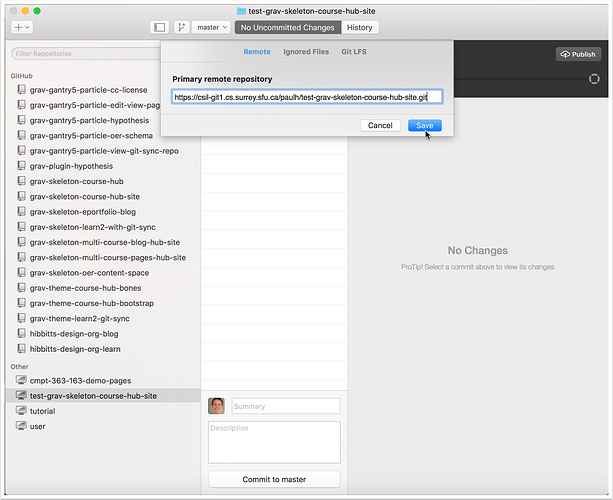
2.6 Return to GitHub Desktop, paste the HTTPS address of your GitLab project into the "Primary remote repository" field in the "Remote" panel and tap "Save"
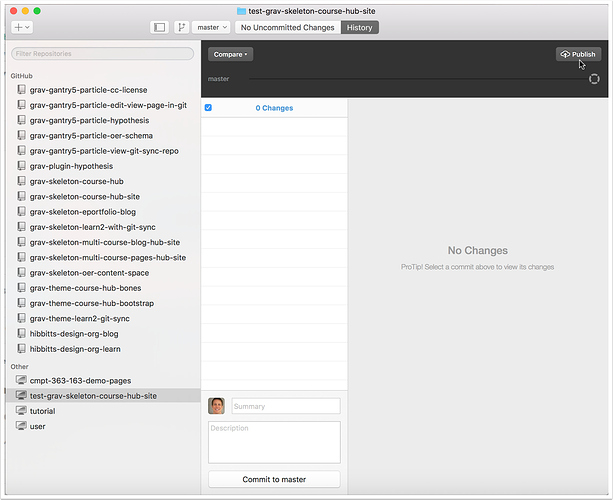
2.7 Tap the "Publish" button
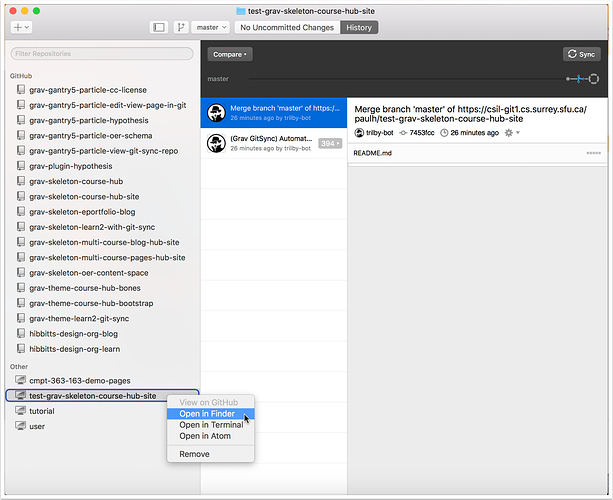
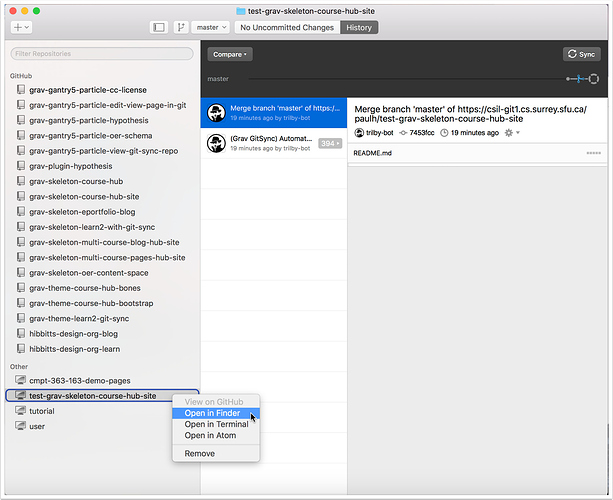
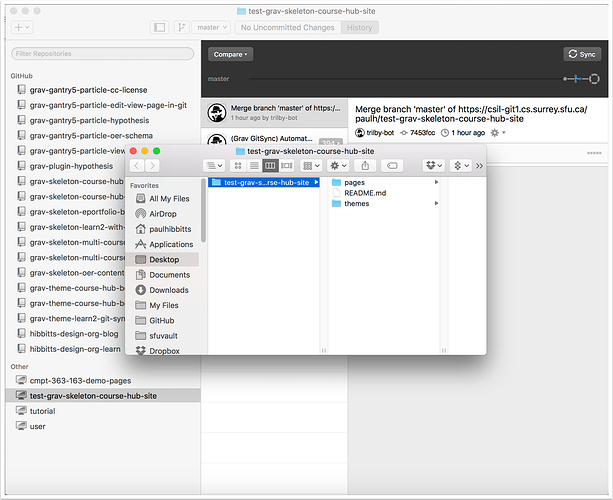
2.8 Right-tap the entry for your newly created local repository folder and view it's local folder
On Mac, choose "Open in Finder"
On Windows, choose "Open in Explorer"
3. Quit GitHub Desktop
4. Delete Local Repository Folder
4.1 Move the folder containing your local repository to the Trash/Recycling Bin
On Mac, right-tap the folder and choose "Move to Trash"
On Windows, right-tap the folder and choose "Delete"
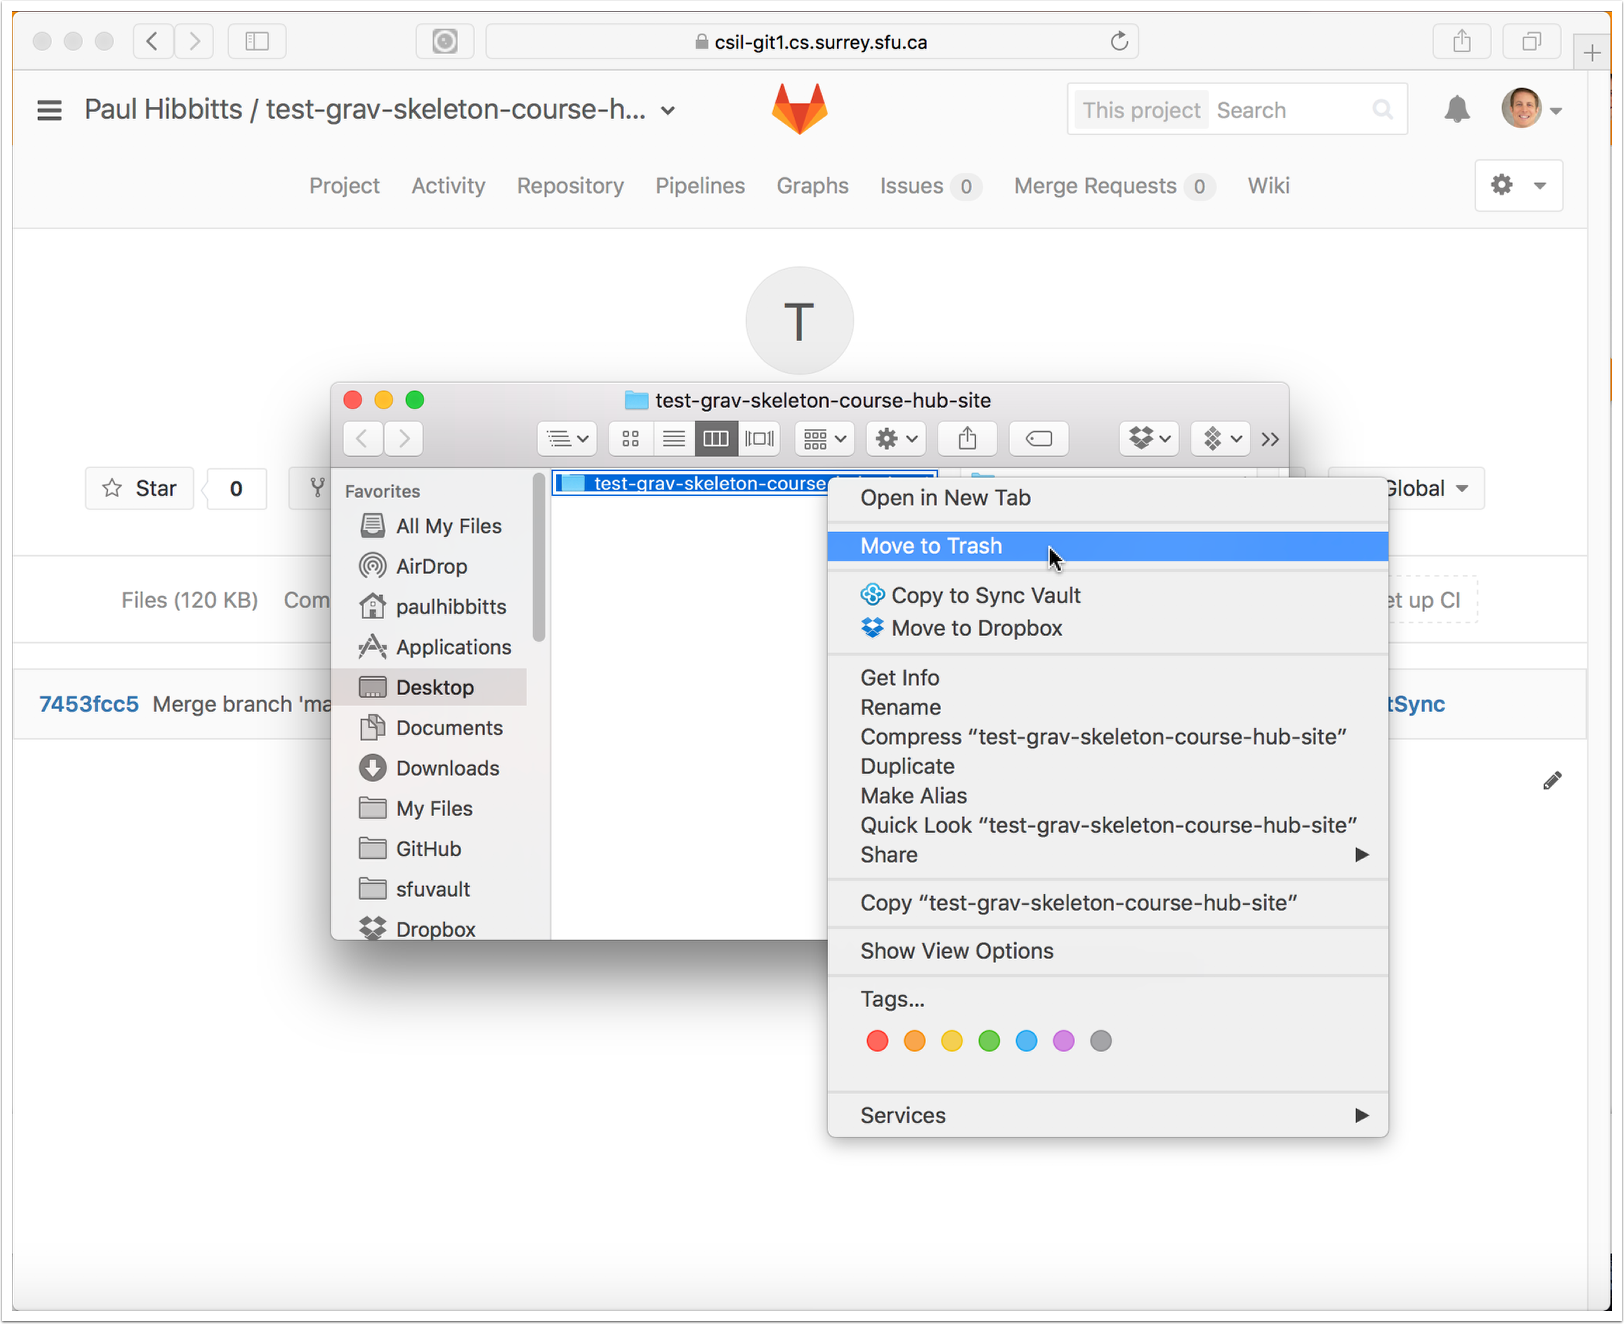
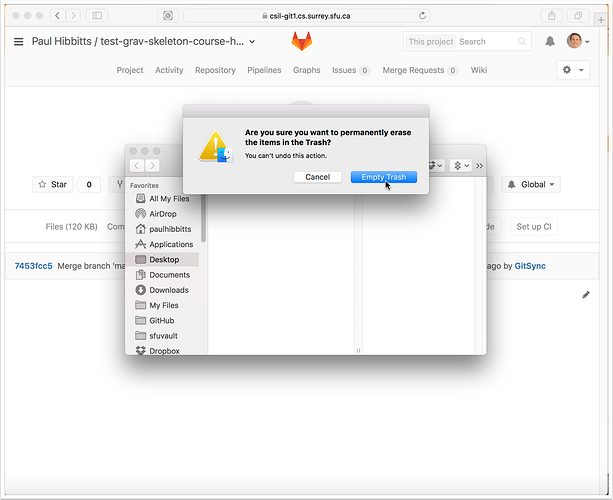
4.2 Permanently delete the repository folder from your Trash/Recycling Bin
On Mac, right-tap the Trash Can and choose "Empty Trash"
On Windows, right-tap the Recycling Bin and and choose "Empty Recycle Bin"
5. Launch GitHub Desktop
6. Re-clone Repository
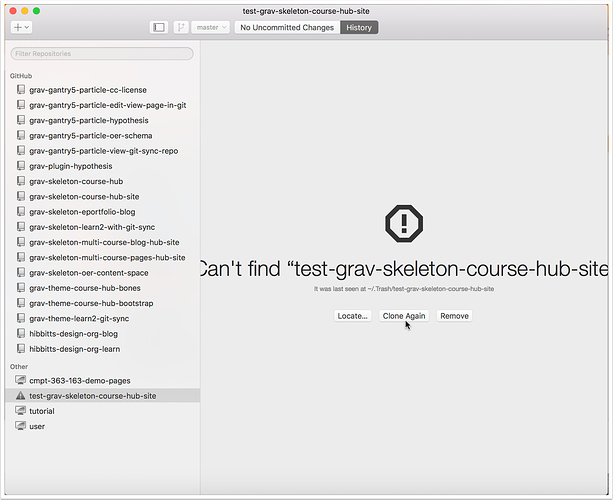
6.1 Select your newly created repository (if needed) and tap the "Clone Again" button in GitHub Desktop
6.2 Right-tap the entry for your newly created local repository folder and view it's local folder
On a Mac, choose "Open in Finder"
On Windows, choose "Open in Explorer"
6.3 Review the files of your cloned GitLab repository
You can now edit these files locally, and use GitHub Desktop to push changes to your remote repository.
